Variables In The GeekyBot!
Variables
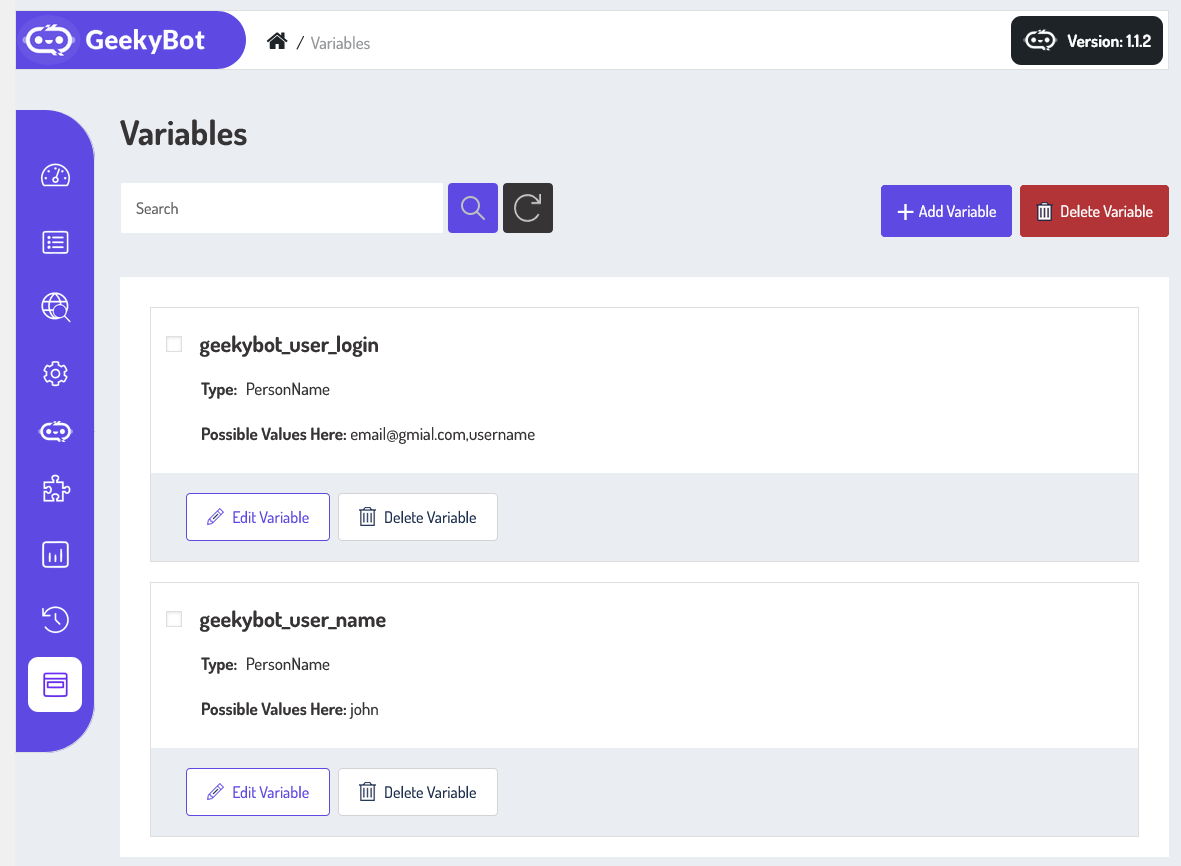
From your admin dashboard, navigate to the Admin Dashboard –> Dashboard Menu –> Variables. On the Variables page, you will find various options for the admin to manage the Variables.
It displays a list of variables added by the admin. Each variable has a name, type, and possible values. It includes search and filter variables by name criteria. There are buttons for various actions like edit variable and delete variable. Additionally, there’s an option to “Add Variable” at the top right of the “Variables” page.
- Manage Variables:
- Buttons for various actions like
- Edit Variable: Modify the variable details.
- Delete Variable: Remove the variable from your list.
- Buttons for various actions like
The action button at the top right allows the admin to delete single or multiple variables (using checkboxes).
Add New Variable
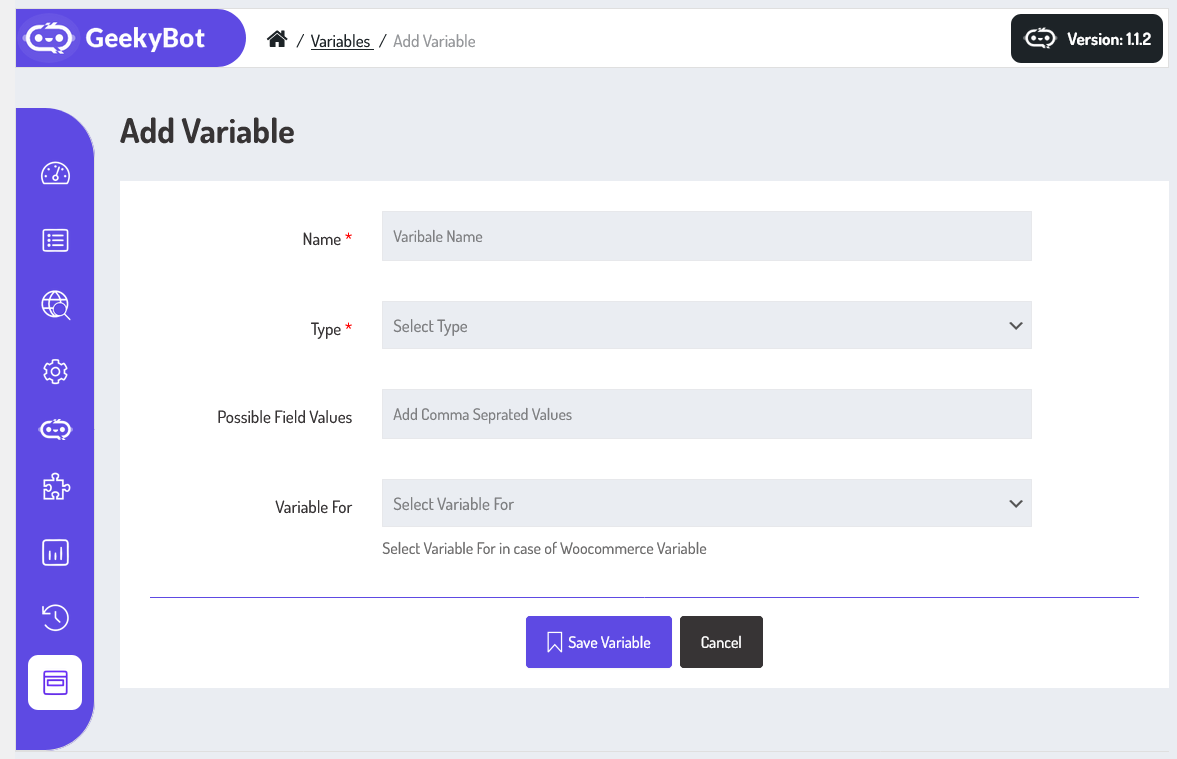
Now, let’s walk through the step-by-step process of adding a variable from the admin end. From your admin dashboard, navigate to the Admin Dashboard –> Dashboard Menu –> Variables –> Add New Variable to start the process of creating a variable effectively. On the ‘Add Variable’ form, we will provide all the necessary details for creating a variable. Now, let’s go through the details required to add a variable from the admin perspective. We’ll cover each aspect,
- Name: Name is a required field to enter the variable name.
- Type: Specify the type of variable. All available types are listed in the drop-down.
- Possible Field Values: Set the possible field values for the variable and add comma-separated values.
- Variable For: There are two options to select a variable for: Product and Attribute. If you select the variable for Woocommerce, then you select the “Product”; otherwise, you select the “Attribute”.
The form also includes buttons at the bottom to “Cancel” or “Save Variable“. Once all these details are filled in and you hit the save button, your variable will be successfully saved.
How To Use Variables In Storyboard
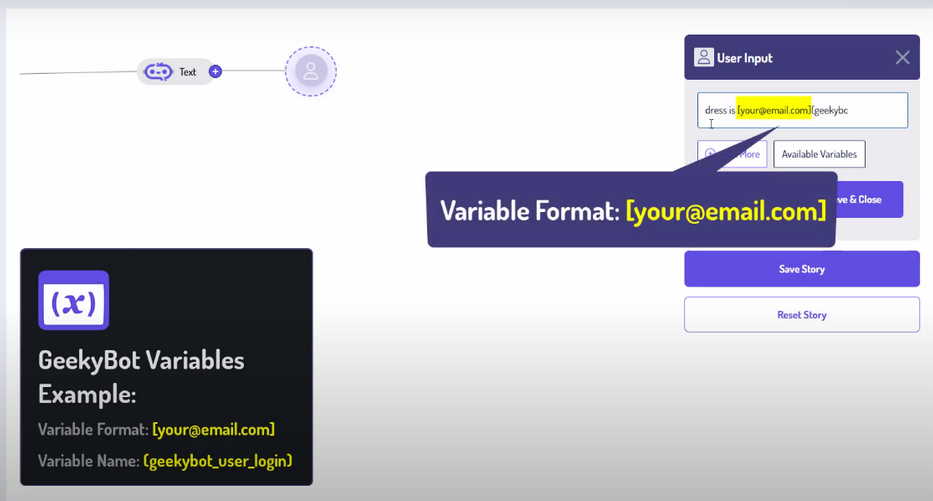
This portion describes the variable format. Admin can use the variable in the storyboard by using this format.
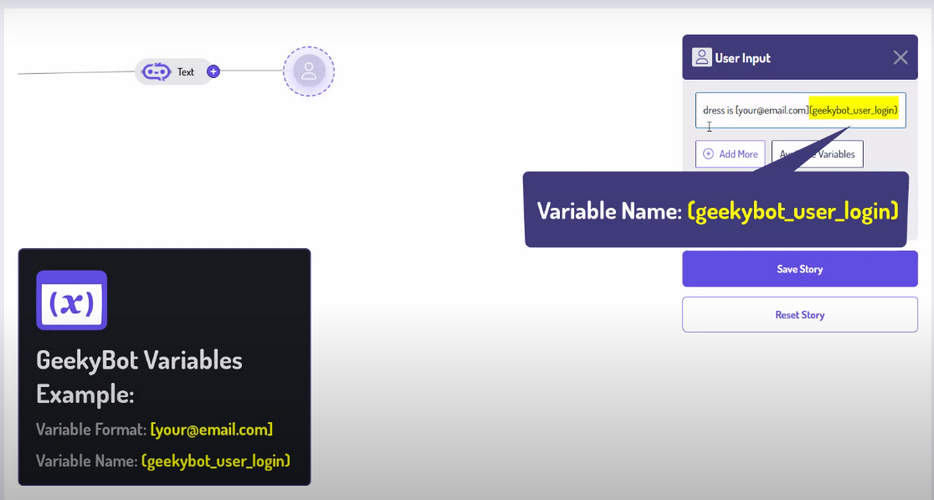
To use a variable, you first need to define it. For example, you might create a variable called {{emailAddress}} to store the email address entered by the user. Once defined, this variable can be reused throughout the story. If the user types “[email protected],” the story can later refer to that email by calling the variable.
Variables make your storyboard flexible and interactive. You can use them to store information such as names, locations, preferences, scores, or any other data point relevant to your story. Once a variable is set, you can reference it multiple times throughout the storyboard to create a sense of continuity and personalization.